Email delivery is not an uncommon issue for those hosting their WordPress sites on a shared hosting platform. In most cases, shared servers are limited to 500 emails per day, they often get blocked for various reasons by big mail providers such as Google or Yahoo and it can become difficult to control spam. Depending on your hosting provider, some SMTP email ports might be blocked as well. Kinsta blocks the port 25, for example.
One of the best approaches to avoid these issues is to use an external email relay service. In this article, we will explore one of these services called Mailgun. One of the best features of Mailgun is that it can use its API to send emails. That means that you can send emails even if the SMTP protocol is blocked completely on your server. In order to follow this tutorial, you will need a WordPress site, access to your DNS settings, a Mailgun account and 15 minutes of free time.
This is our 5-Step Guide on How to Use Mailgun on your WordPress Site
- Setting up a Mailgun account
- Adding a domain to your Mailgun account
- Setting up your DNS records
- Installing and activating the Mailgun WordPress plugin
- Configuring the Mailgun plugin
1. How to Setup a Mailgun account
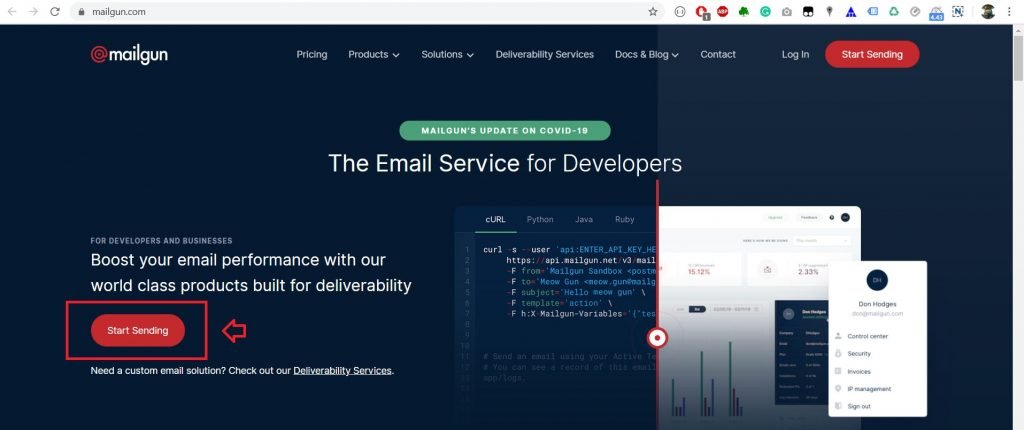
Once you visit Mailgun‘s homepage you need to select the ‘Start Sending’ option as shown on the screenshot above. This will take you to the sign-up page.
Then you should fill out the registration fields (name, email, password, etc.). On top of that, you’ll need to enter your credit card details. Don’t worry, you’ll get 5000 free emails for the first 3 months.
Your card will be billed only if you go beyond 5,000 emails in the first 3 months. After that, they will charge your card according to the chosen payment plan.

2. How to Add your Domain to Mailgun
After you’ve successfully registered an account, visit your Mailgun dashboard and add your domain. It is recommended to use a subdomain, similar to mail.mydomain.com). You’ll still be able to send emails from your main domain.
Click on ‘Sending’ and then click on ‘Add New Domain’.

This will take you to a page where you should fill out the chosen domain name.
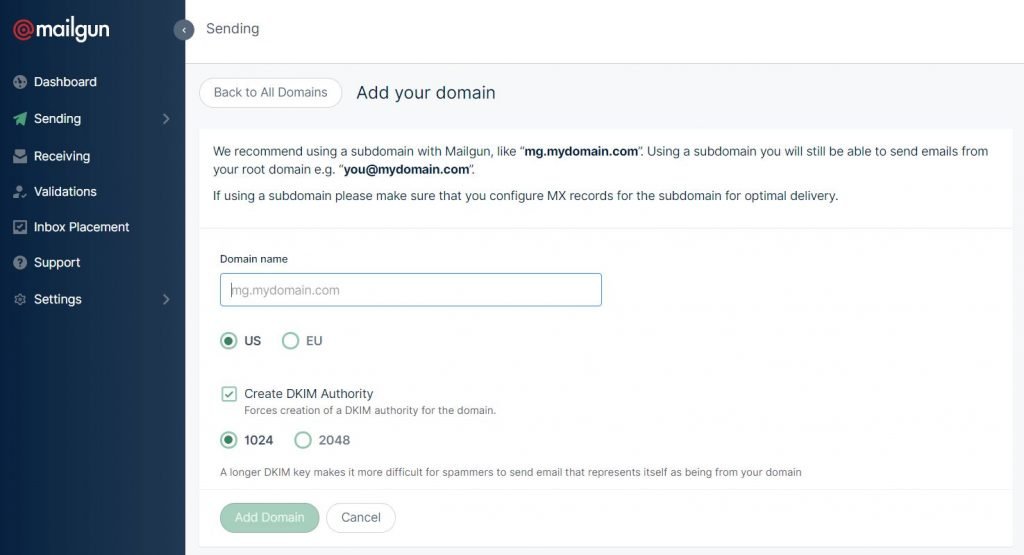
One of the great things about the Mailgun is that they actually give you very precise instructions on how to configure your DNS records. In most cases, configuring DNS can be painful, it involves calling your hosting provider support and spending many hours on the phone. Contrary to that, you will see a set of instructions on how to add TXT, MX and CNAME records to your DNS settings.
3. How to Setup your DNS Records
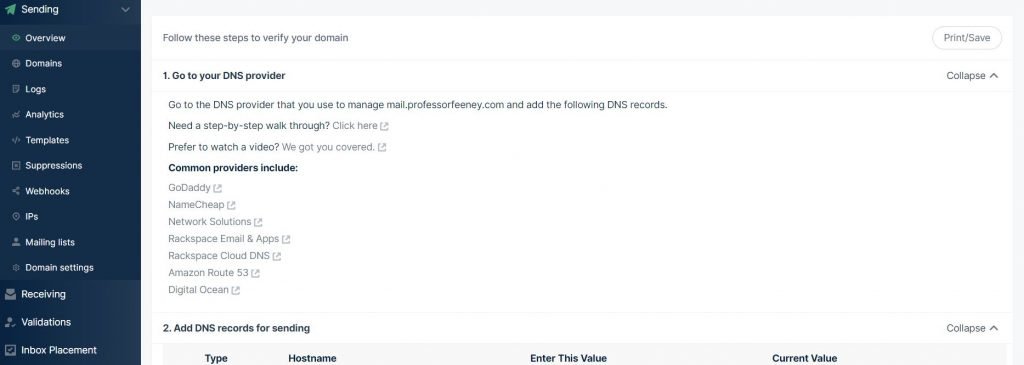
The first thing you need to do is access DNS settings. There are links under ‘Common providers include’. If your DNS provider is on this list, click on the corresponding link. You will see a help article with instructions on how to access and change your DNS settings.
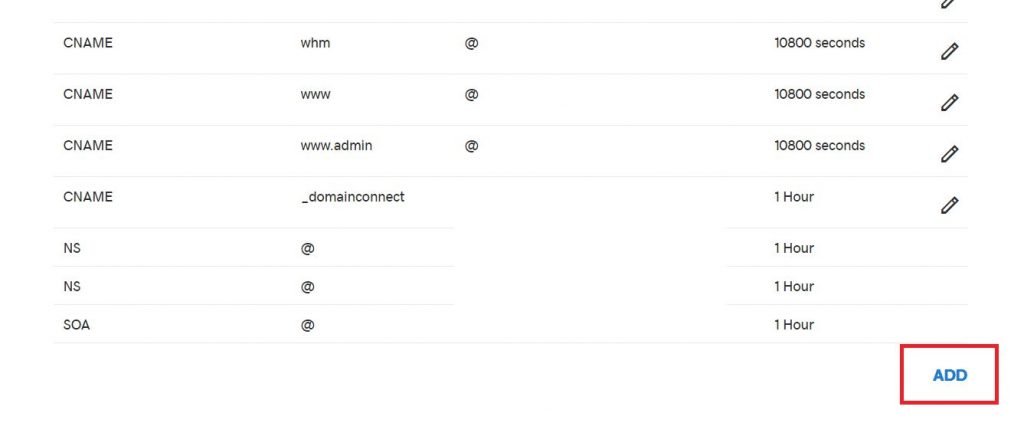
After you’ve accessed the DNS settings, you will be able to add DNS records. Click ‘Add’. You will need to choose the ‘TXT’ type record. Also, you should use your chosen subdomain (or domain) and enter that in the ‘Host’ field. Then copy over the TXT value from your Mailgun account.
Important: If you are using GoDaddy hosting, you shouldn’t enter the entire Hostname specified by Mailgun, just the prefix. For example, instead of entering ‘mail.domain.com’, just enter ‘mail’.
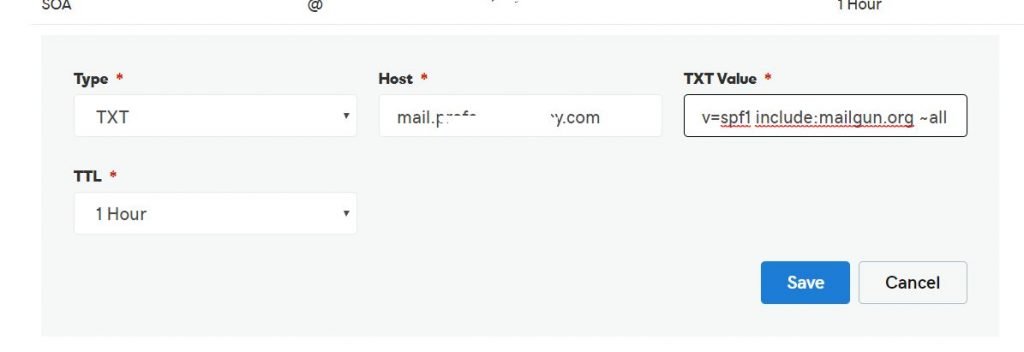
You will need to repeat this process for adding MX and CNAME records. It is basically the some – click ‘Add’, then choose ‘MX’ (or ‘CNAME’) as a record type and copy the host and the value from the Mailgun instructions.
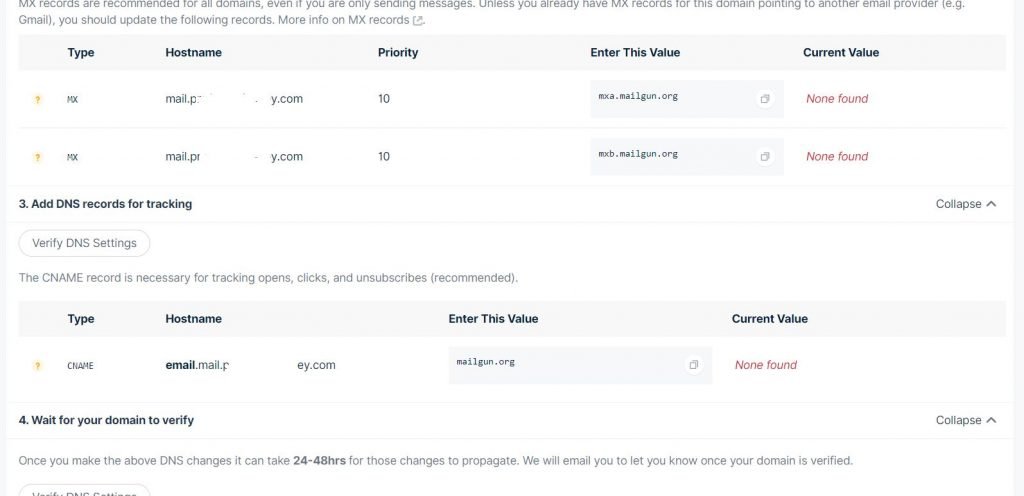
After you enter all of the records, as shown above, click on ‘Verify DNS Settings’. Depending on your provider, these changes can take up to 24 hours to propagate. This is dictated a lot by the TTL value. TTL stands for ‘Time To Live’ and it is assigned to every record in the DNS.
If your provider allows it, you can reduce the TTL to 10 minutes (or 600 seconds) which will help to speed up these changes.
4. Installing and activating the Mailgun plugin

This is a fairly simple step. Click on ‘Plugins’ in the left sidebar of your wp-admin dashboard. Next, click ‘Add New’. After that, type ‘Mailgun’ in the search field. Click ‘Install’ and then click ‘Activate’.
5. Configuring the Mailgun plugin
You will need to obtain your API key from your Mailgun account.
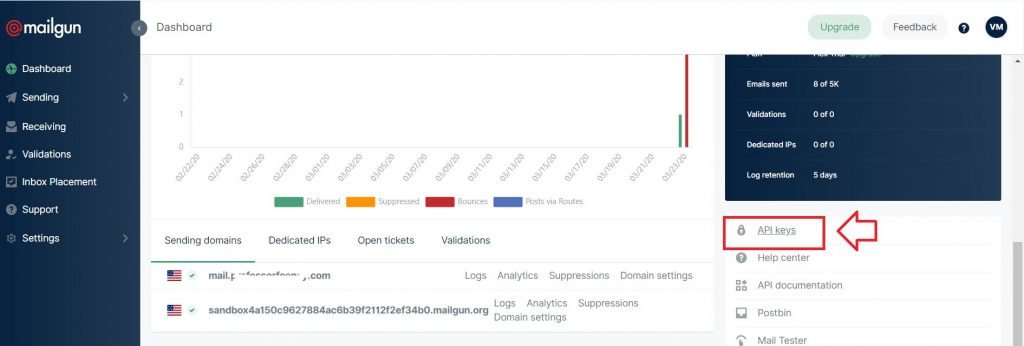
Log in to your Mailgun account, click on ‘Dashboard’ and then click on ‘API keys’ in the bottom right (check the screenshot above). You will see three API keys. The one you need is the first one. Click on the eye icon and then copy the API key.

Log in to your Mailgun account, click on ‘Dashboard’ and then click on ‘API keys’ in the bottom right (check the screenshot above). You will see three API keys. The one you need is the first one. Click on the eye icon and then copy the API key.

Next, head back to your wp-admin dashboard. Click on ‘Settings’ in the left sidebar and then choose ‘Mailgun’. Check out the following screenshot:
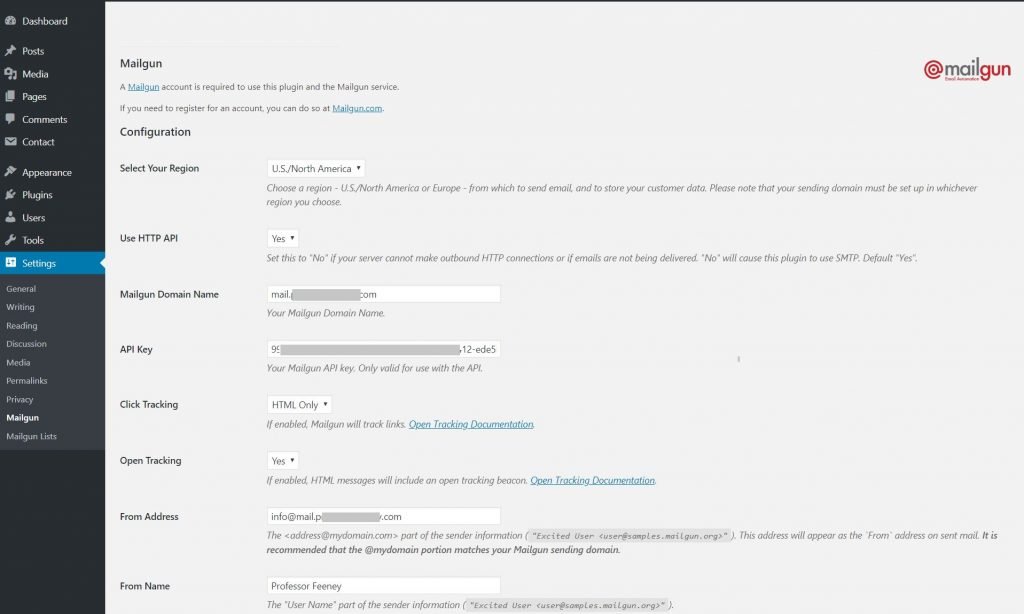
Select Your Region – The first thing you should do is to select your region. In order for the plugin to work, you need to select the region where your sending domain is located.
Use HTTP API – Next, you should choose between using HTTP API or SMTP protocol. As mentioned at the beginning of the article, the HTTP API is faster, more reliable and this method will work even if your SMTP ports are blocked. This is definitely a better choice.
Mailgun Domain Name – This is the domain that you added to your DNS records.
API Key – This is where you should paste the API key from your Mailgun account.
From Address – The ‘from address’ is what appears as the sender when someone gets an email from you (or your site). It doesn’t need to be an actual email, but it is important to enter an email that would have the same domain as your Mailgun domain. For example, [email protected].
You can leave the rest of the options at default values.
Testing
After you’ve completed all of the steps above, you need to test and see if everything’s working.
Let’s take a step back and go through what is it that Mailgun actually does. For example, whenever someone registers on your site, WordPress generates a ‘New User’ email that is sent to the admin email. Instead of sending the email through SMTP ports, WordPress will use Mailgun API to send the message from the Mailgun server.
Why is this important? This means that the recipient email address needs to be valid.
So log out of your WordPress site and then register as a new user. If your WordPress admin email is valid, Mailgun will deliver the message and log the events on your Mailgun account. Otherwise, Mailgun will log that the message ‘bounced’.

Conclusion
As you can see, the Mailgun is pretty easy to set up. It gives you an excellent overview of the usage and it can be affordable. Pricing tiers are well distributed so you can choose the plan that’s appropriate for your business. Its deliverability is definitely superior to shared servers.
Once again, using Mailgun requires valid email addresses. If you are having trouble receiving emails in general, Mailgun is not going to solve that. However, it will definitely help if your server has issues with outgoing emails.
Leave a Reply