Last Update: October 10, 2023.
What is a Japanese keyword hack
This is a spam-related hack where hackers inject Japanese words into your WordPress site title and description. At the same time, it manipulates your Google Search Console site property and any submitted sitemaps. The search engine usually chooses the one in the featured picture above. Hackers take advantage of this type of malware by inserting links to other sites into your pages linked to their affiliate ID, tricking your visitors and redirecting them to sites selling fake brand merchandise at half of the original price. Every time someone buys a product from those sites, the hacker will receive a commission for the sale.
How to find if your site is infected by the Japanese keyword hack
Step 1: Check Google Search Engine Results
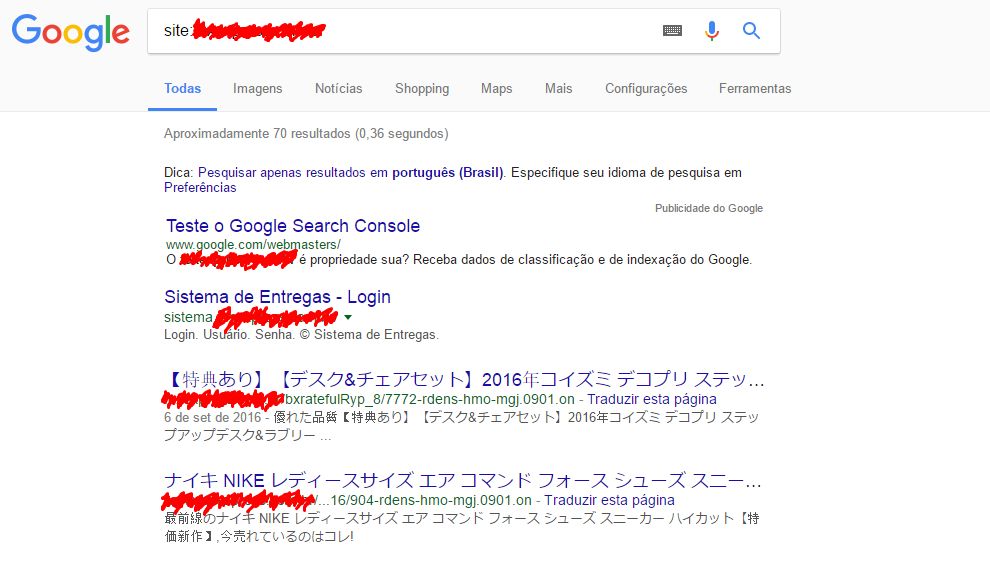
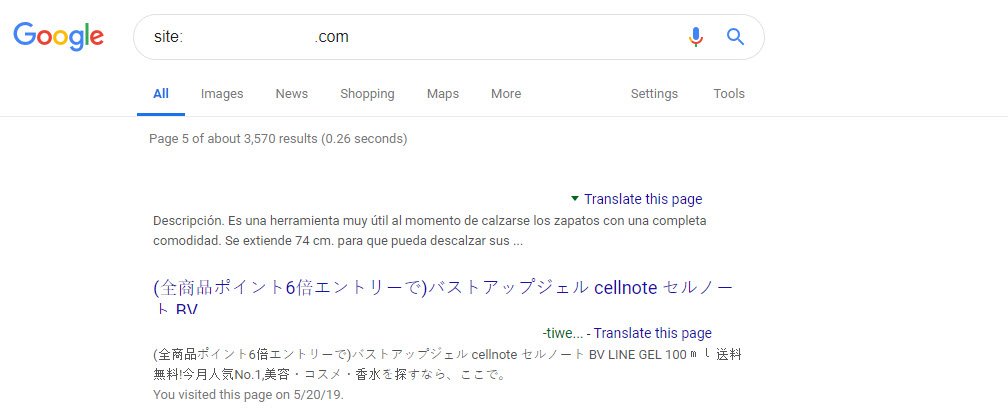
Since this hack is only visible to search engines, identifying infected pages in your WordPress website is not easy. One way to spot the hack is to run a search query in Google for your domain, for example, “yourdomain.com” or “site:yourdomain.com”, and see if the results display any Japanese words in your site title and description.
Step 2: Check your Google Search Engine Console for malware penalties
Most of our clients who ask us to clean their hacked WordPress site found out about the Japanese hack after receiving a warning in their Google Search Console account, similar to the one found below:
“Google has detected that your site has been hacked by a third party who created malicious, unexpected or harmful content on some of your pages. This issue affects your site’s reputation by showing the hacked content on your site or in search results. We recommend you remove the hacked content from your site as soon as possible. Once removed, our system will automatically reflect these changes as we update our index.
Following are some example URLs. Review them to gain a better sense of where this hacked content appears, and how it may have been placed on your website. The list is not exhaustive.“
Even if you never received any such message, you need to visit the Security Issues Page within your GSC to see if any warning is present.
Step 3: Check for URL cloaking
In the previous Step, we asked you to check Google’s search engine results for your domain; if you followed any spammy links from your site and got redirected to your site’s 404 default page, you must ensure this link isn’t cloaked. URL cloaking shows a different version of your page to search engines and real human visitors. This way, you will see that your site contains the Japanese hack in Google’s search engine results, but if you try and visit that page, you will be redirected to a not found page. Once more, you can use Google Search Console and its “Fetch as Google” tool to see if the requested URL is cloaked.
If you ever find yourself in this position, you must clean your site as soon as possible because Google will blacklist your website and your site visitors won’t be able to find it in Google’s search engine results or visit it through their Chrome browsers. The longer you leave the hack on your website, the bigger the damage.
How to clean the WordPress Japanese keyword hack
Considering that your hosting provider can’t help you remove the Japanese spam malware, you need to take action and remove the hack by cleaning your WordPress website. Below, we’re attaching a simple guide to help you spot and remove such malware. Remember, though, that if you’re not experienced enough in malware cleanups, you may not be able to clean your WordPress site fully.
Step 1: Create a backup of your site and archive it by compressing it
Use your hosting panel and create a backup of your live site; make sure the backup file is compressed(for example, a zip file) so malware can’t start infecting the site again once it’s clean.
Step 2: Check your Google Search Engine Console
Log into your Google Search Engine Console and navigate to the sitemaps page; delete any sitemaps you didn’t submit. You also need to look at the users who have access to this site property and remove any Owners or Users not created by you.
Step 3: Clean your .htaccess file
Use your Hosting Panel File Manager or an FTP client like Filezilla and browse to your WordPress site root directory. In there, you should see a file under the name .htaccess. Access it and see if there are any weird rules present. If you’re not experienced in working with .htaccess, delete it and create a new one using the same name. Then, add the default WordPress htaccess rules and save it.
Step 4: Copy your WordPress configuration database connection strings
Another important file hackers like to target and inject malware is your WordPress configuration file: wp-config.php. Experienced WordPress users can browse its contents and delete those that don’t seem to belong to wp-config.php default contents. If you don’t want to edit this important WordPress file, I suggest copying your WordPress database connection strings and pasting them inside the wp-config-sample.php, replacing the default ones. Then go and delete wp-config.php file and rename wp-config-sample.php to wp-config.php.
Step 5: Replace your WordPress core files
The best and safest way to clean a hack or malware infection is to delete all your site files and re-upload them freshly downloaded from WordPress.org. After writing down the WordPress version your site is using, delete all WordPress root core files and WordPress core directories. Then download the WordPress version your site used from WordPress.org and upload all files and dirs your deleted.
Step 6: Replace all of your WordPress themes and plugins
In this step, you will repeat the replacement process of all your WordPress themes and plugins. You first need to write down all their names and versions, then download them from WordPress.org or any other site where you first found them. Finally, delete all current themes and plugin dirs and upload the ones you downloaded. You should also replace your wp-content/index.php file with the default one.
Step 7: Check your uploads dir
Browse your wp-content/uploads directory for any .php, .js and .ico files. Whenever you find one, check if it has a weird file name and if its creation date was recent; also, check its content for weird characters and strings like “base64_decode, rot13, eval, strrev, gzinflate”. If you find any such file, then delete it. Remember that your media files directories under wp-content/upload shouldn’t contain any .php, .js or .ico files, so if you find any, delete them immediately.
Step 8: Ask Google to re-examine your site
Once finished, I suggest you monitor any file changes made on your site for the next day, then audit them, and if they seem legit, ask Google from your Search Console to re-consider your site. After a few days, they will send you a reply and hopefully whitelist your site again.
How to Remove your Japanese Hacked Pages from Google index
Most of the time, a WordPress site infected by the Japanese Spam Malware already has many hacked pages indexed by Google. Even though your WordPress site is now clean, you still need to wait for Google to drop those hacked pages. If you don’t want to wait and put at risk your site and brand reputation, you should proceed and ask Google to remove the hacked page URLs using their URL Removal Tool under your Google Search Console.
Cleaning so many WordPress sites infected with the Japanese Spam Hack, we have created a specific procedure for you to follow to ask Google to de-index and remove your Japanese hacked pages. Even though this is a simple procedure, you need to be careful so you won’t remove all your website pages from Google’s index.
1. Remove Hacked Pages from Google Manually
Step 1: Search Google for your spam-indexed pages by using site:yoursite.com
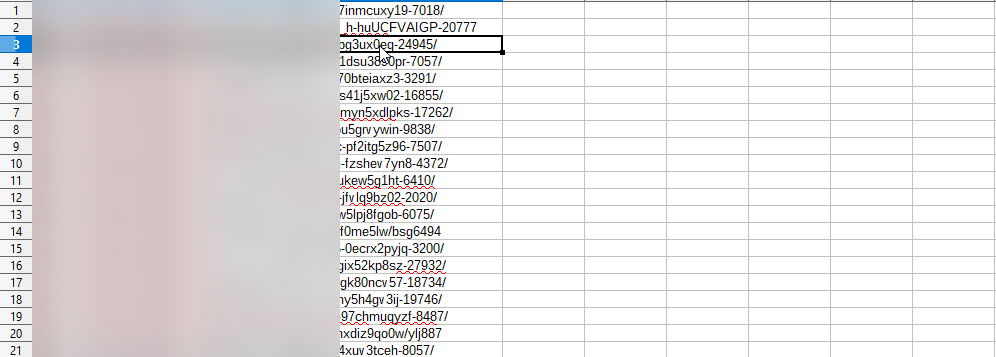
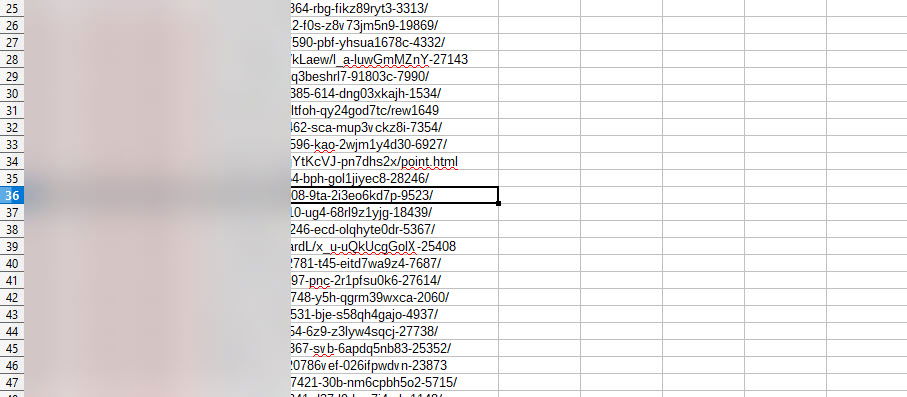
Step 2: Browse all of the search results and write down all the Japanese hacked page URLs into a CSV file
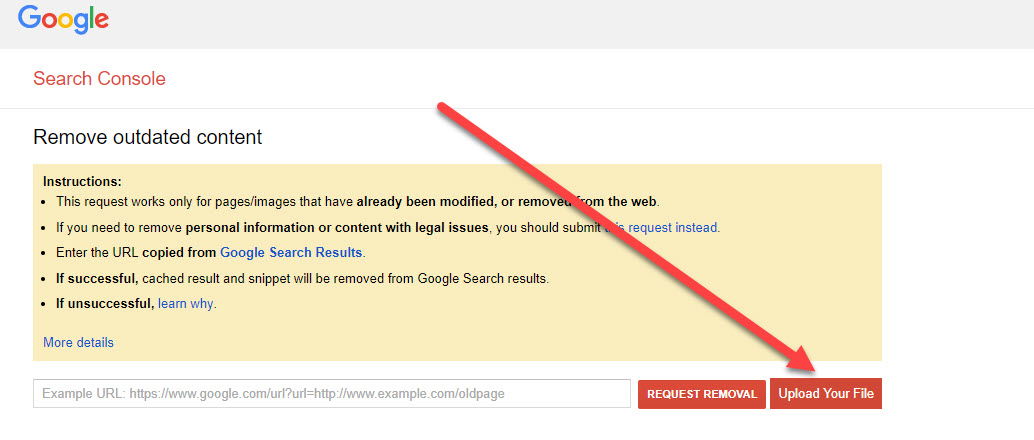
Step 3: Log into your Google Search Console and visit the URL Removal Tool page
Step 4: Submit each of those Japanese spam pages into the Remove Outdated Content tool and request the removal
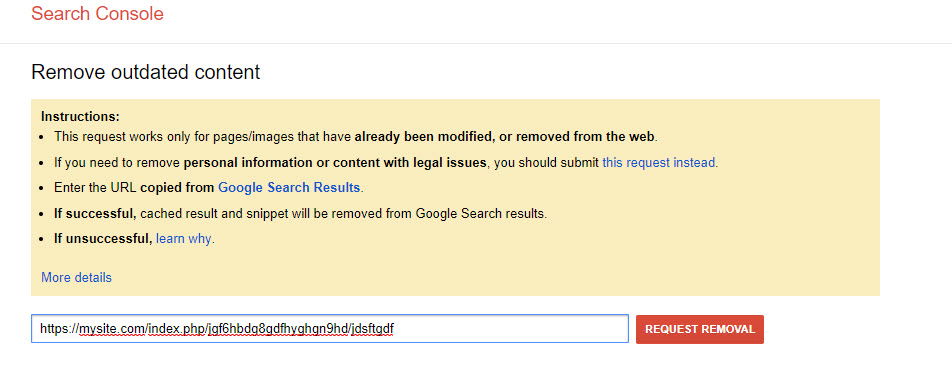
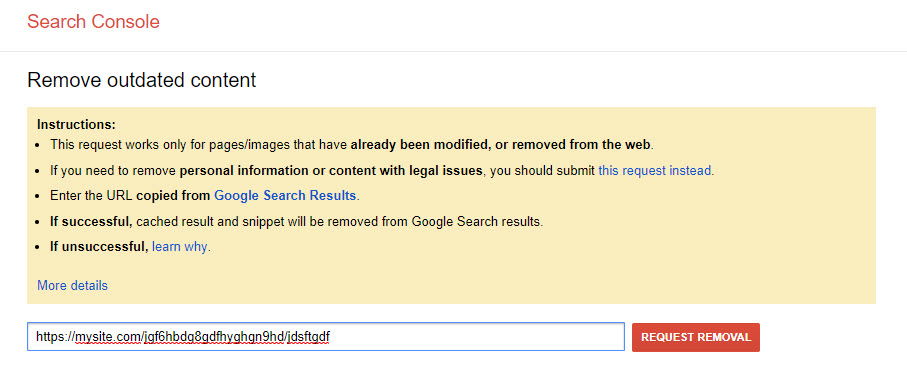
If your spam-indexed pages contain “index.php” as a part of their permalink, you must submit its URLs twice with and without index.php.
Google only needs a few hours to start removing the submitted URLs.
2. Remove Hacked Pages from Google Automatically
If your hacked WordPress site has more Japanese spam pages indexed by Google than you can handle, we suggest looking at our automated spam page removal guide, which is found below. This guide should be followed carefully because any wrong move may risk your site’s SEO efforts.
If you don’t feel comfortable using this guide and still need to remove your Japanese hacked pages from Google’s search results, we suggest looking at our own Malware Removal Services for WordPress sites.
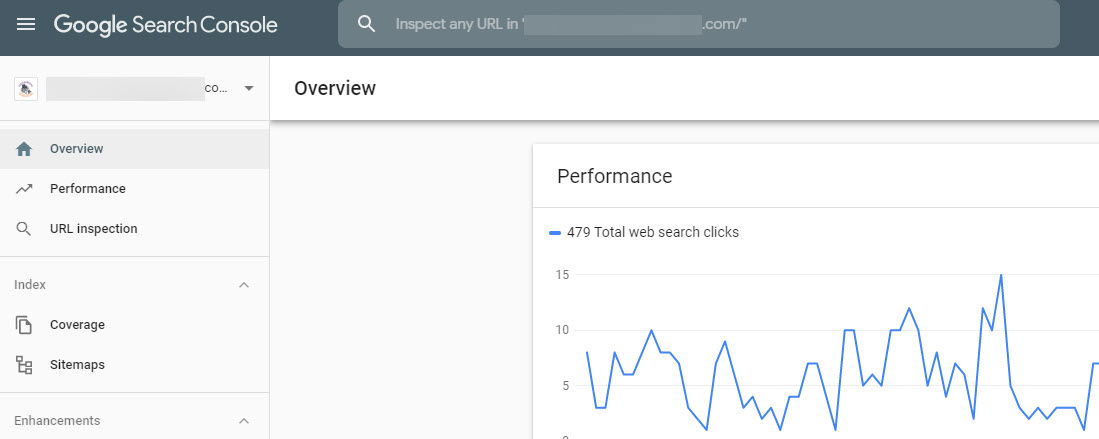
Step 1: Visit your Google Search Console Coverage Report
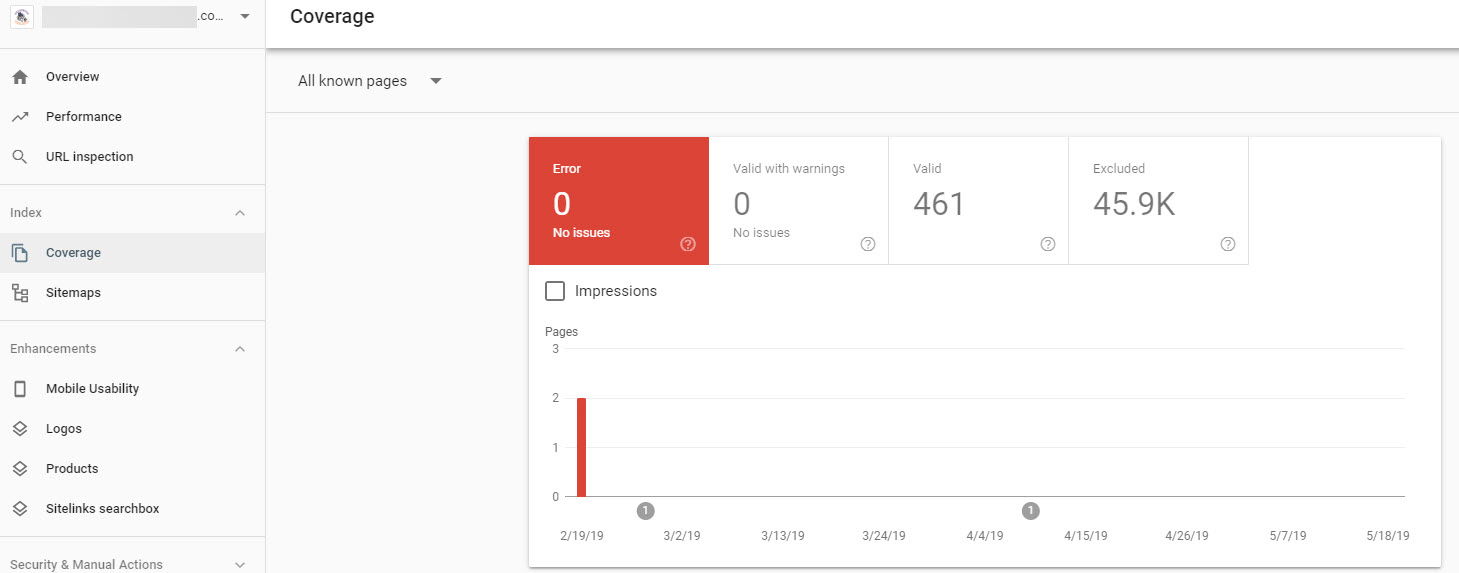
Step 2: Select the Valid Pages option
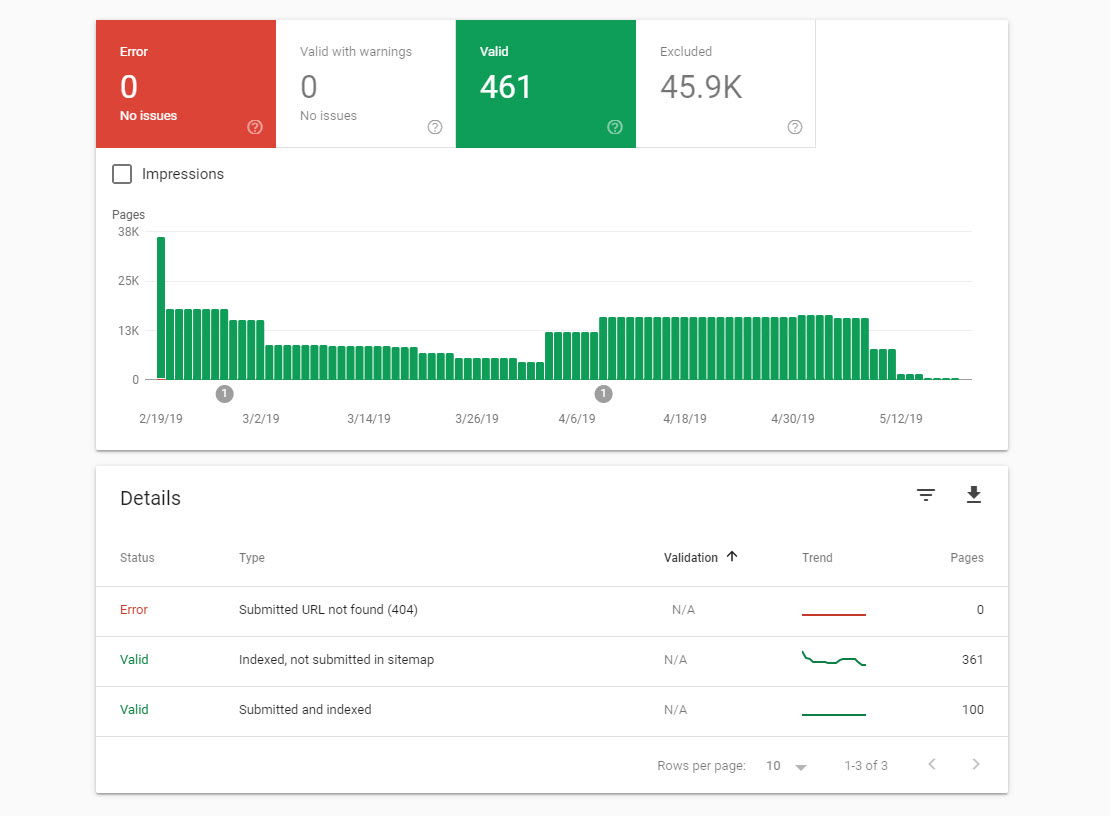
Step 3: Visit the Indexed, not submitted in sitemap Page and request to download a list of those URLs as a CSV file

Step 4: Duplicate the CSV file and strip the “index.php” permalink for each and any of the URLs which contain it
So now you should have two CSV files; the first will be the default CSV as downloaded from your Google Console, while the second will be the same but without the index.php permalink for each URL.
This is necessary because even though Google has indexed the Japanese Hacked page using the index.php, for example, https://yoursite.com/index.php/hd5jhuyuiy/9h_jgfd-swkj, if you visit that page(and bypass your antivirus warning) then you’ll be redirected to a similar page but without the index.php in its permalink, for example, https://yoursite.com/hd5jhuyuiy/9h_jgfd-swkj. This means you must ask Google to remove the indexed spam page and its redirect.
Step 5: Download and install Bulk URL Removal Extension for Google Chrome
There is a neat Google Chrome extension in Github for removing Google Search Index outdated content in bulk, which will help you automate the removal process. You need to install this extension while using the Developer Chrome mode manually; if that sounds Japanese to you, then follow our screencast below:
Step 6: Load the CSV file into Google’s Content Removal Tool
While logged into your Google Search Console, visit the Removal Outdated Content Page and use the “Upload your file” option, which has been added after installing the Bulk Content Removal Extention to upload the CSV with your “indexed, not submitted in sitemap” URL list. Make sure to run the procedure twice, once for each CSV file.
Once the CSV has been submitted the extension will automatically start submitting the listed URLs.
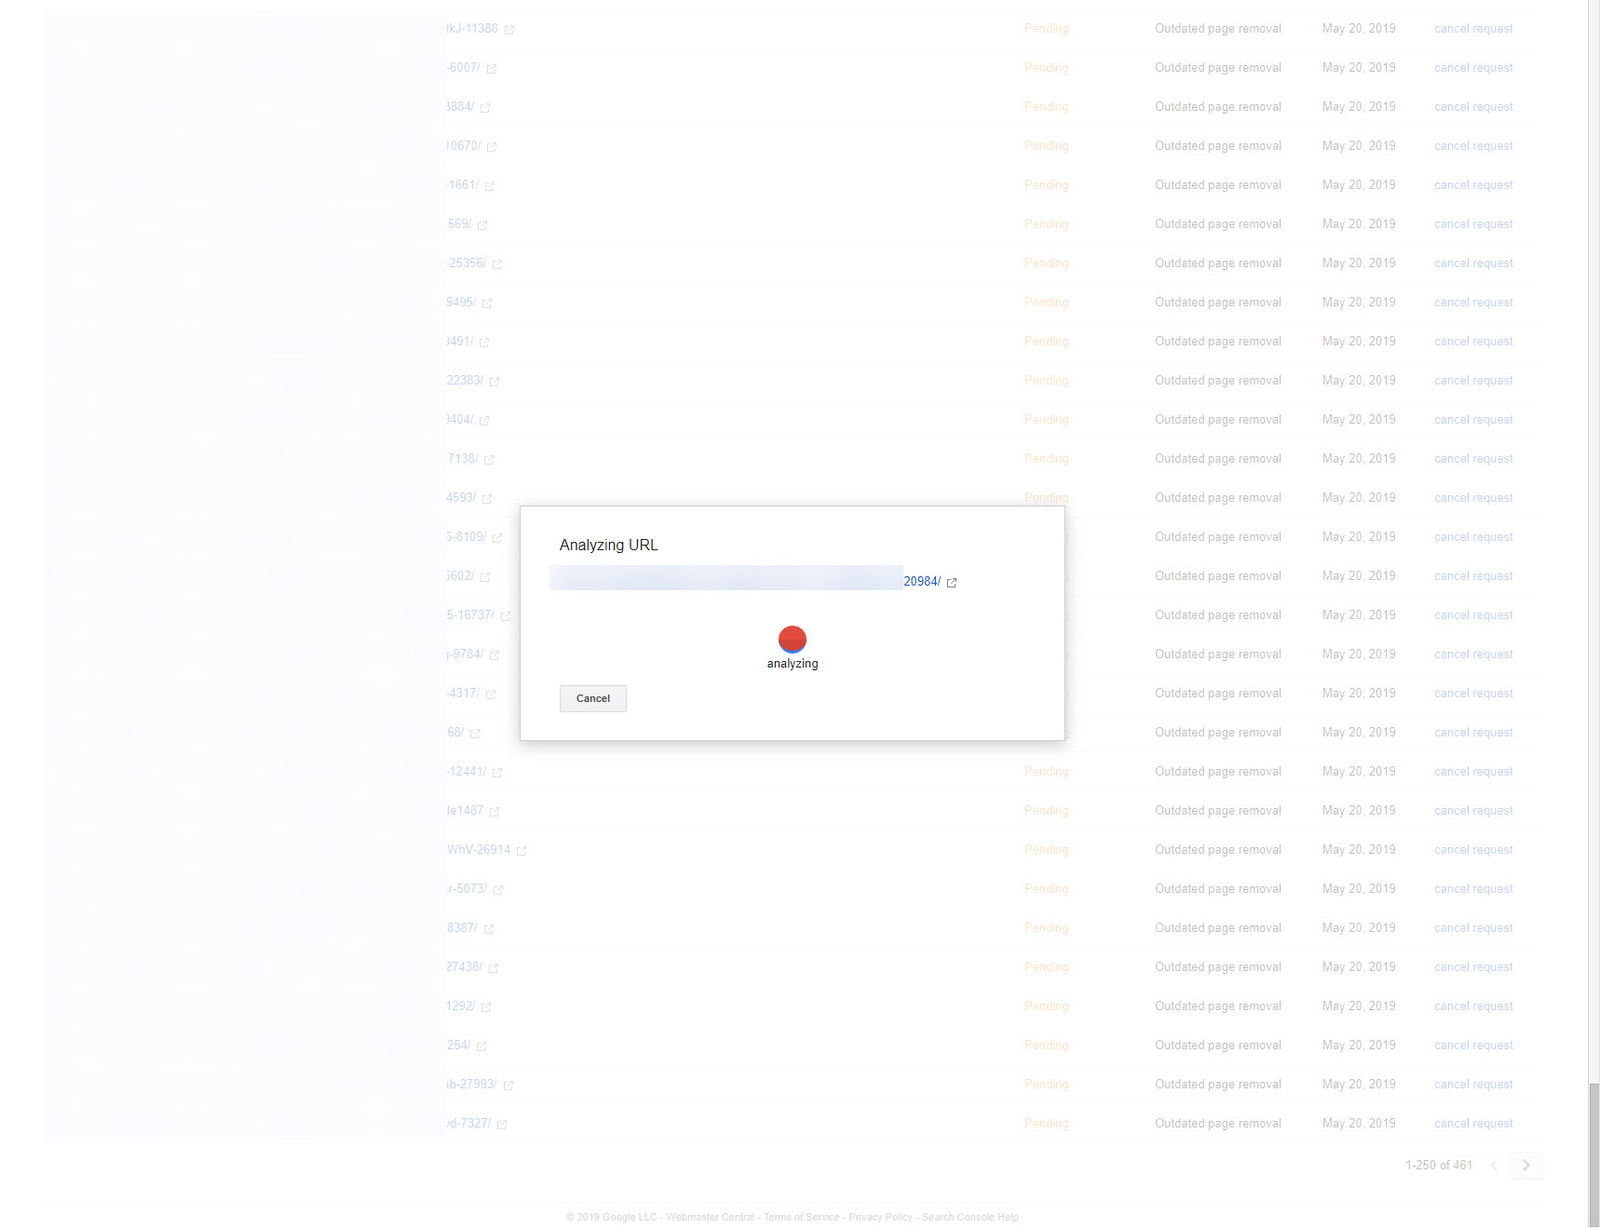
Each URL submission will be analyzed and requested for removal automatically.
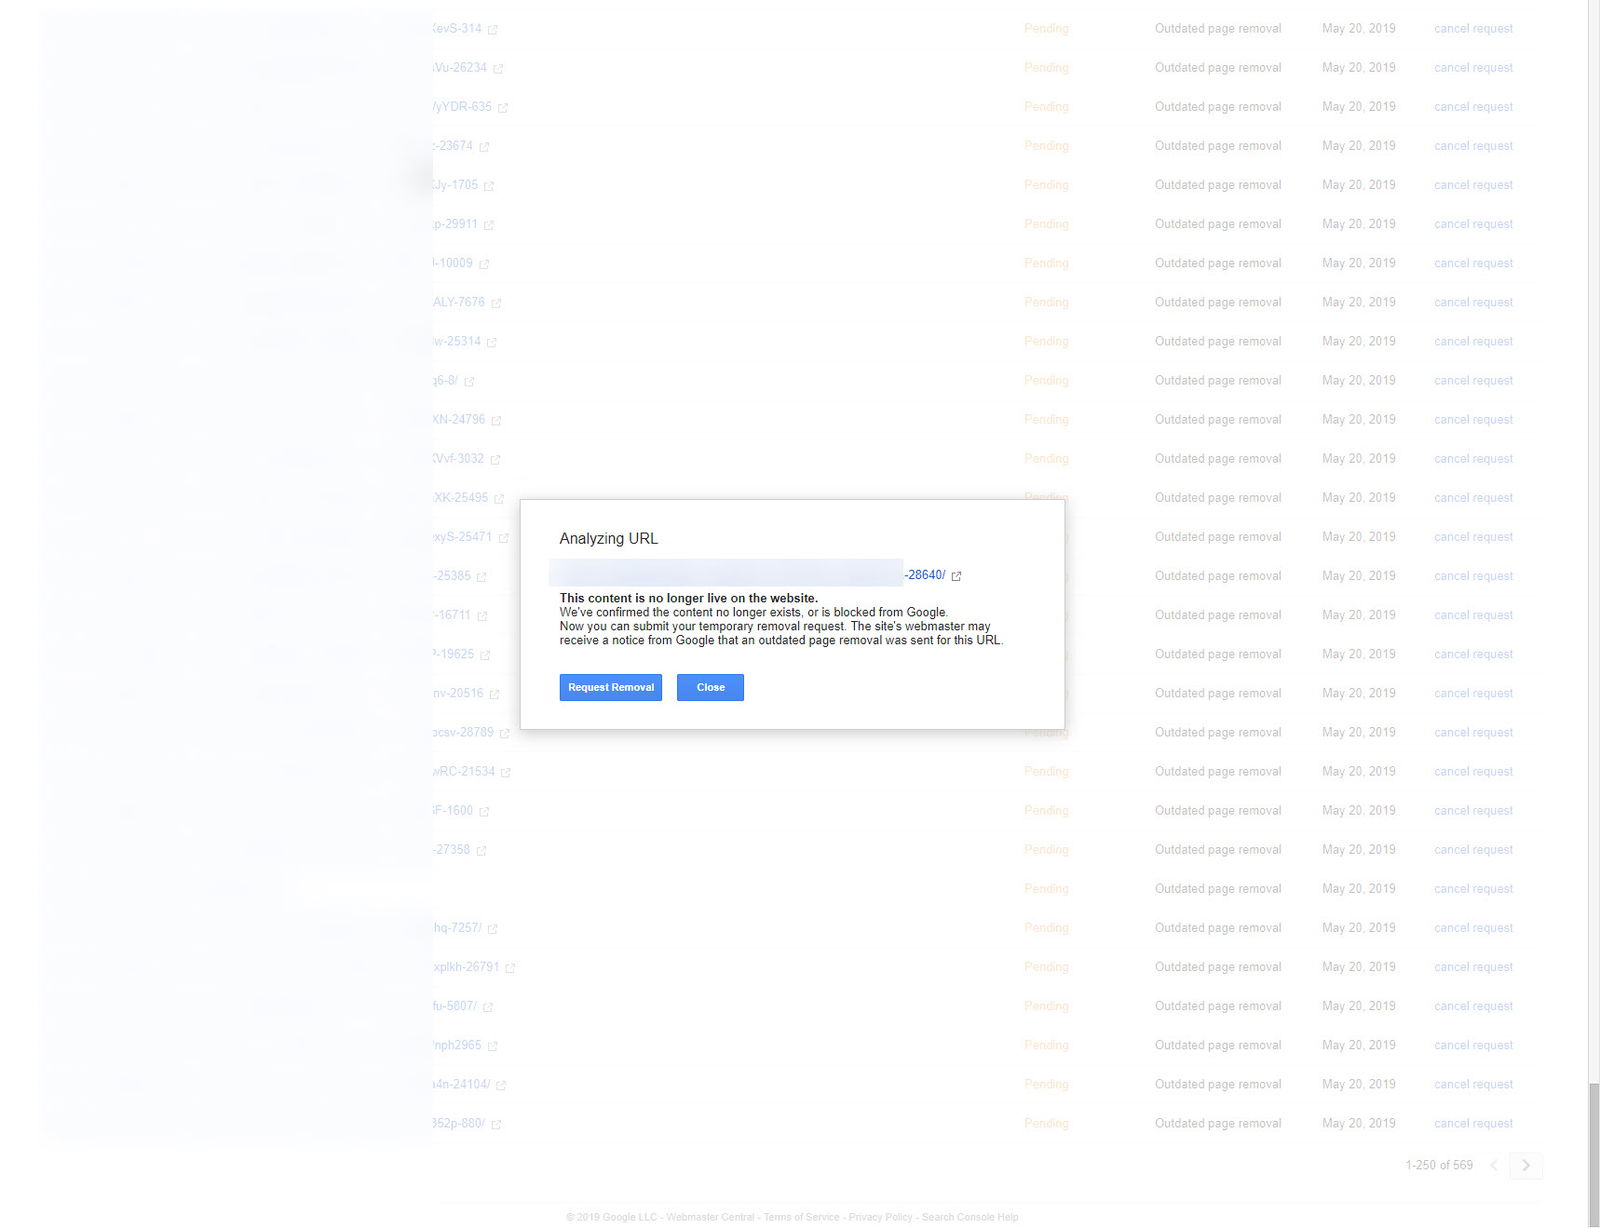
If the submission succeeds, then you will receive a notice like the one shown below:

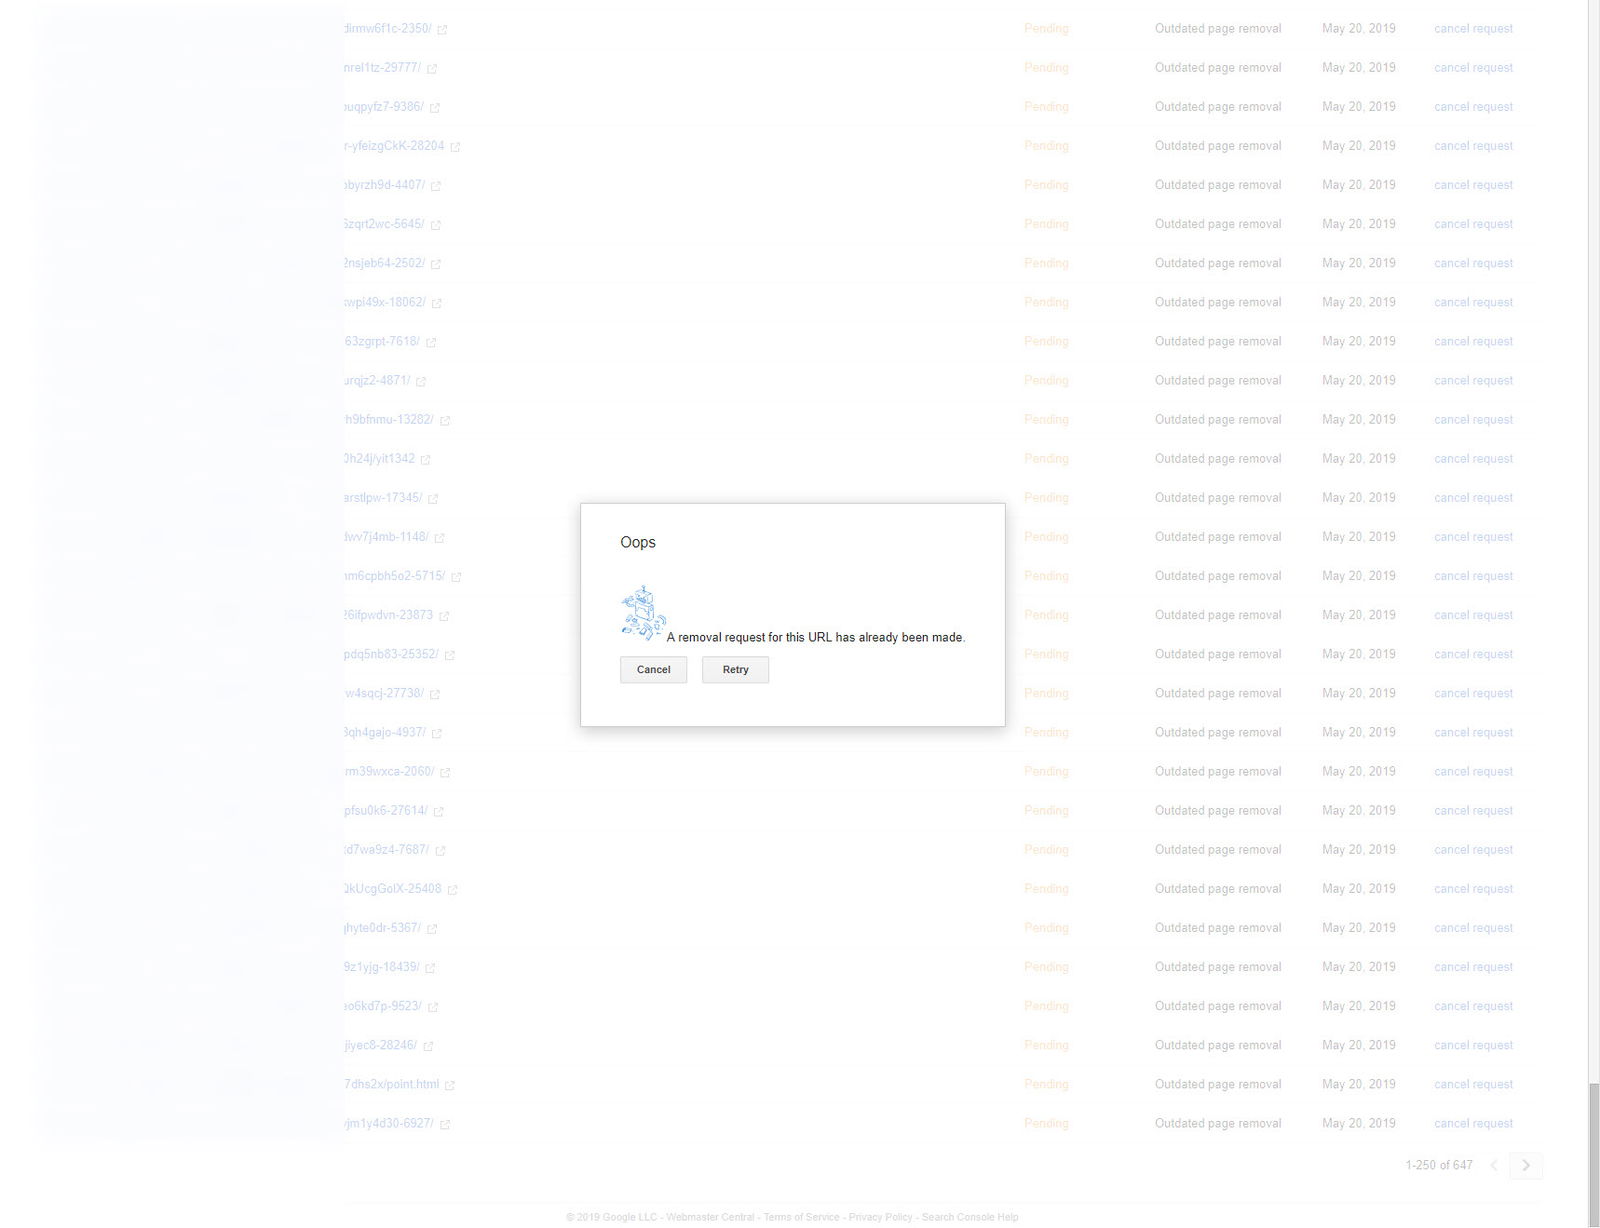
If one of the listed URLs for removal has already been submitted, a warning will pop up; you can bypass it by selecting the “Cancel” option. In this case, the extension will continue submitting the next URL in the list.
Notice:
This tutorial should be followed carefully, or else your site may have loading issues. Be aware, however, that cleaning malware through a tutorial may not always lead to success since there are many other things that can’t be displayed in a tutorial to consider when cleaning a WordPress site. If you don’t feel comfortable cleaning your WordPress site, feel free to request a quote from us to remove the Japanese keyword hack from your WordPress site.
Infected with Pharma Hack?
If your WordPress site was infected with the Pharma Hack Spam Malware,, we suggest looking at our recent guide on How to Detect, Clean And Secure Your WordPress Site From The Pharma Hack.
Thanks for sharing, it really help me resolve the hack issues!
Thank you, Leon!
It feels good knowing that people can get their sites cleaned up using our Japanese hack removal tutorial.
How did you do that?
I am trying to fix this issue from last few months, but couldn’t get it fixed.
Any help will be deeply appreciated!
Thanks in advance!
Hello Amit!
Did you try following our Japanese hack removal guide?
Just loved it!
I’m glad this guide helped you and other WP users with hacked sites removing the Japanese spam hack 🙂
Thanks, brother! I have been searching for this long time, Your tutorial helps me a lot to save my website from Hacker.
Especially your last step! bulk URL upload, I learned a new thing today.
Thank you!
We’ll add one more update soon enough for such cases which the site hosting server redirects the spam URLs to the homepage instead of a 404. Stay tuned!
Really! Waiting for It.
thanks this is helpful.i’m under attack
Hello! Make sure to follow the guide and clean your site asap before Google caches your Japanese keyword spam pages. If not it would even harder to clean your WordPress site and force Google to de-index all those Japanese hacked pages.
okay thanks a lot
Try using this plugin, The plugin contains rate limit options \ blocking bad bots \ search engine crawlers manager and so on..
https://wordpress.org/plugins/booter-bots-crawlers-manager/
Your comment is not related to the article content or other comments below this post. Nevertheless, I will approve it because there might be someone interested in your plugins. If more such comments pop up from you or other visitors I will have to remove it.
Even my website also had this japanese key issue. Checked with the bluehost team and they have provided me with the list of infected files. I just deleted them and it worked perfectly.
The best thing to do is to clean your infected site and any other sites hosted under the same cPanel account. Removing the infected files is never enough.
Best service I have ever had. They do what they promise and get to the work immediately after they receive your request. They are knowledgeable, fast, and honest. Thank you for your time and valuable expertise:))